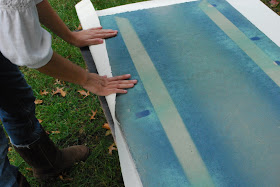
So into the garage I went and I found all the tools I needed to make something quick! Using a piece of left over homasote from an old DIY project, a stapler gun and some leftover grass cloth ceiling.
Here are the easy steps:
Cut piece of Homasote: This was a left over piece that was already a good size so I didn't need to cut it. The nice thing about homasote is that you do not need a table saw to cut it. So if you purchased a large sheet at your local home improvement store you could use a knife or razor to cut it to size:

To apply wallpaper use spray glue. I used grass cloth, because due to it's texture it will hide push pin marks and I used spray glue, because due to the porous nature of the homasote wallpaper paste would steep into the board rather quickly. Spray the homasote and the back of wallpaper:

Then flip it over and staple it into place to secure wallpaper even more:

For the corners make an angled cut to get a smooth finish:

Ta da you are almost finished! Now just nail it into the wall. We just used 4 nails and tacked them in the corners.
*Excuse my sparkly walls. We did a candlelight technique in the room and when the flash hits the sparkles come out!

Last use clear push pins as your jewelry hangers and start placing your jewels:

Close up of jewels:

Best part was that we hung the board behind our door. So when it's opened my manly husband doesn't have to see sparkly gems all through out our room:

So easy and it cost me nothing, because it was all supplies that I had around the house.

Fabulous! I have tried something similar in the past but found that some of my necklaces were a bit too heavy for the push pins. Any thoughts on a sturdier option?
ReplyDeleteI love it! Your collection of jewelry is beautiful! I have a similar set up in my closet and used hook eye (? I think that's what they're called) and they are really sturdy and work well.
ReplyDeleteomg, i need one of these so bad! i have so many friggin necklaces and i need a cute way to display them- love this!!
ReplyDeleteSo when should i expect you to come and install one for me? Next week you say? ok perfect, see you then!
Great idea Jenn. I was going to mention eye hooks. I was trying to do my budget with things I had at home so push pins worked for me.
ReplyDeleteI have a couple of heavier pieces on the board and I just a couple of push pins throughout the piece to hold it in place.
Linds I keep telling Jon he needs to surprise you in Boston one weekend and do projects for you!
ReplyDeleteHe is slowly coming around to the idea. :)
Looks great! Is it hanging in your bedroom or bathroom? I'd love a big board like that, but there is no room in my bath or closet.
ReplyDeleteHey Cassie,
ReplyDeleteIt's hanging behind the door of my bedroom. It works perfectly there. I can get to it when I need to, but during the day while my door is open it doesn't look like a totally girly room so my husband is okay with it.
-C
Very cool! I would love to do something like this in my closet! Janell
ReplyDeletevery smart and exactly what I need!! Great project, that even I could possobly accomplish!!
ReplyDeletexoxo
Karena
Art by Karena
This is a great idea! It's functional and creates a piece of art at the same time (:
ReplyDeleteHi, I just stumbled across your blog today and am so glad I did! This jewelry hanger looks too cute, I might just have to use something similar for all my long necklaces that are currently stored in a drawer. I feel like when you see them on display you are more likely to come up with fun combinations to outfits!
ReplyDeleteI made a pinboard for my living room covered in cotton duck. Used spray adhesive and lots of nailhead trim. After I hung it, the fabric (which seemed really stretched tight before) puckered. Have you had this happen? I am known to be a little uptight about details....so I might be the only person this bothers. Or do you have a trick :)?
ReplyDeleteyou are full of great ideas.. love this one. thanks!
ReplyDeleteCamila- The perfect ying to the yang of your newly organized jewelry drawer! Beautiful!
ReplyDeleteLoretta
Looks really pretty!! I can't wait to see more of your bedroom!
ReplyDeleteHmmm... I might have to do this! Great idea. And wish I had so many great necklaces, etc!
ReplyDeleteLOVE IT! I am in the middle of some jewelry organization too.....pvc pipe...might have to do a post.
ReplyDeleteYou are on a roll! Love this!
ReplyDeleteSo functional! I love a DIY using items you already own. Those are always the best, aren't they?
ReplyDeleteI found this tutorial on Pinterest and I LOVE it! I make a lot of DIY jewelry, and this is perfect for storing all my creations (my husband says I have too many...lol). I think I'm going to make one covered in fabric for my bedroom wall. :)
ReplyDelete